

Color Swatches with Linen Quill Minis
I have wanted to knit a multi-color, boho-inspired version of the Petunia Pullover for a while now, and the sideways-along that Patricia and I are hosting right now is a perfect opportunity to explore this idea.
While I love the spontaneity of casting on a project and figuring things out on the go, I didn’t want to invest a lot of time into a sweater I wouldn’t enjoy wearing. So, I started planning for something that would look unplanned, fun, and spontaneous :D
First, I wanted to see what color scheme I wanted in my sweater. To do that, I created these color swatches by wrapping yarn (Linen Quill Minis) around cardboard strips. I saw fellow designer Amy van de Laar do this with the Dayspring Pullover she knitted last year and really liked this idea. I wrapped each color six times and secured the ends with scotch tape on the back of the strips. Doing this exercise allowed me to see how colors behaved next to other colors. For example, notice how identical colors look different depending on the background color in the top two swatches. These two swatches were my favorite, but I wanted to see if a more randomly picked color combo would look good in a sweater, but I didn’t want to waste any more yarn.

Paper doll, four color combo versions of Petunia, and two pair of pants I wear most often
While I wanted to test my ideas for a boho-inspired version with more or less random colors, I also wanted to see how different color combinations would look in an entire sweater and how these sweaters would fit within my wardrobe. For this, I made a big paper doll (12 inches tall!) and “dressed” her using watercolor-painted sweaters and pants. I painted four versions of sweaters: two to match the two swatches I liked the best from the previous experiment (in the photo with the paper doll, it’s the bottom sweater and the one to the right of it) and two that had random colors mixed in. The one on top of the picture is more random than the one on its lower left, where I tried to alternate between darker and lighter values. From all these four versions, I ended up liking the bottom one (it’s one of the two from the previous exercise) and the one to the left of it, the one with more organized random colors :D
I must admit that while the process was fun, it took a lot of time. If I were to do this again (and I’m sure I will), I’d make a smaller doll and use regular copy paper and pencils or markers.
By the way, I used this website to create my paper doll (aka croquis). I printed out one of the “models” that looked similar to mine and transferred it onto watercolor paper using tracing and carbon paper. After that, I put a tracing paper on top of the page with my paper doll and drew the sweaters and pants. Then, I transferred these images onto watercolor paper, painted them, and cut them out. I have used this website many times and love it for the various body sizes, shapes, and positions it provides.
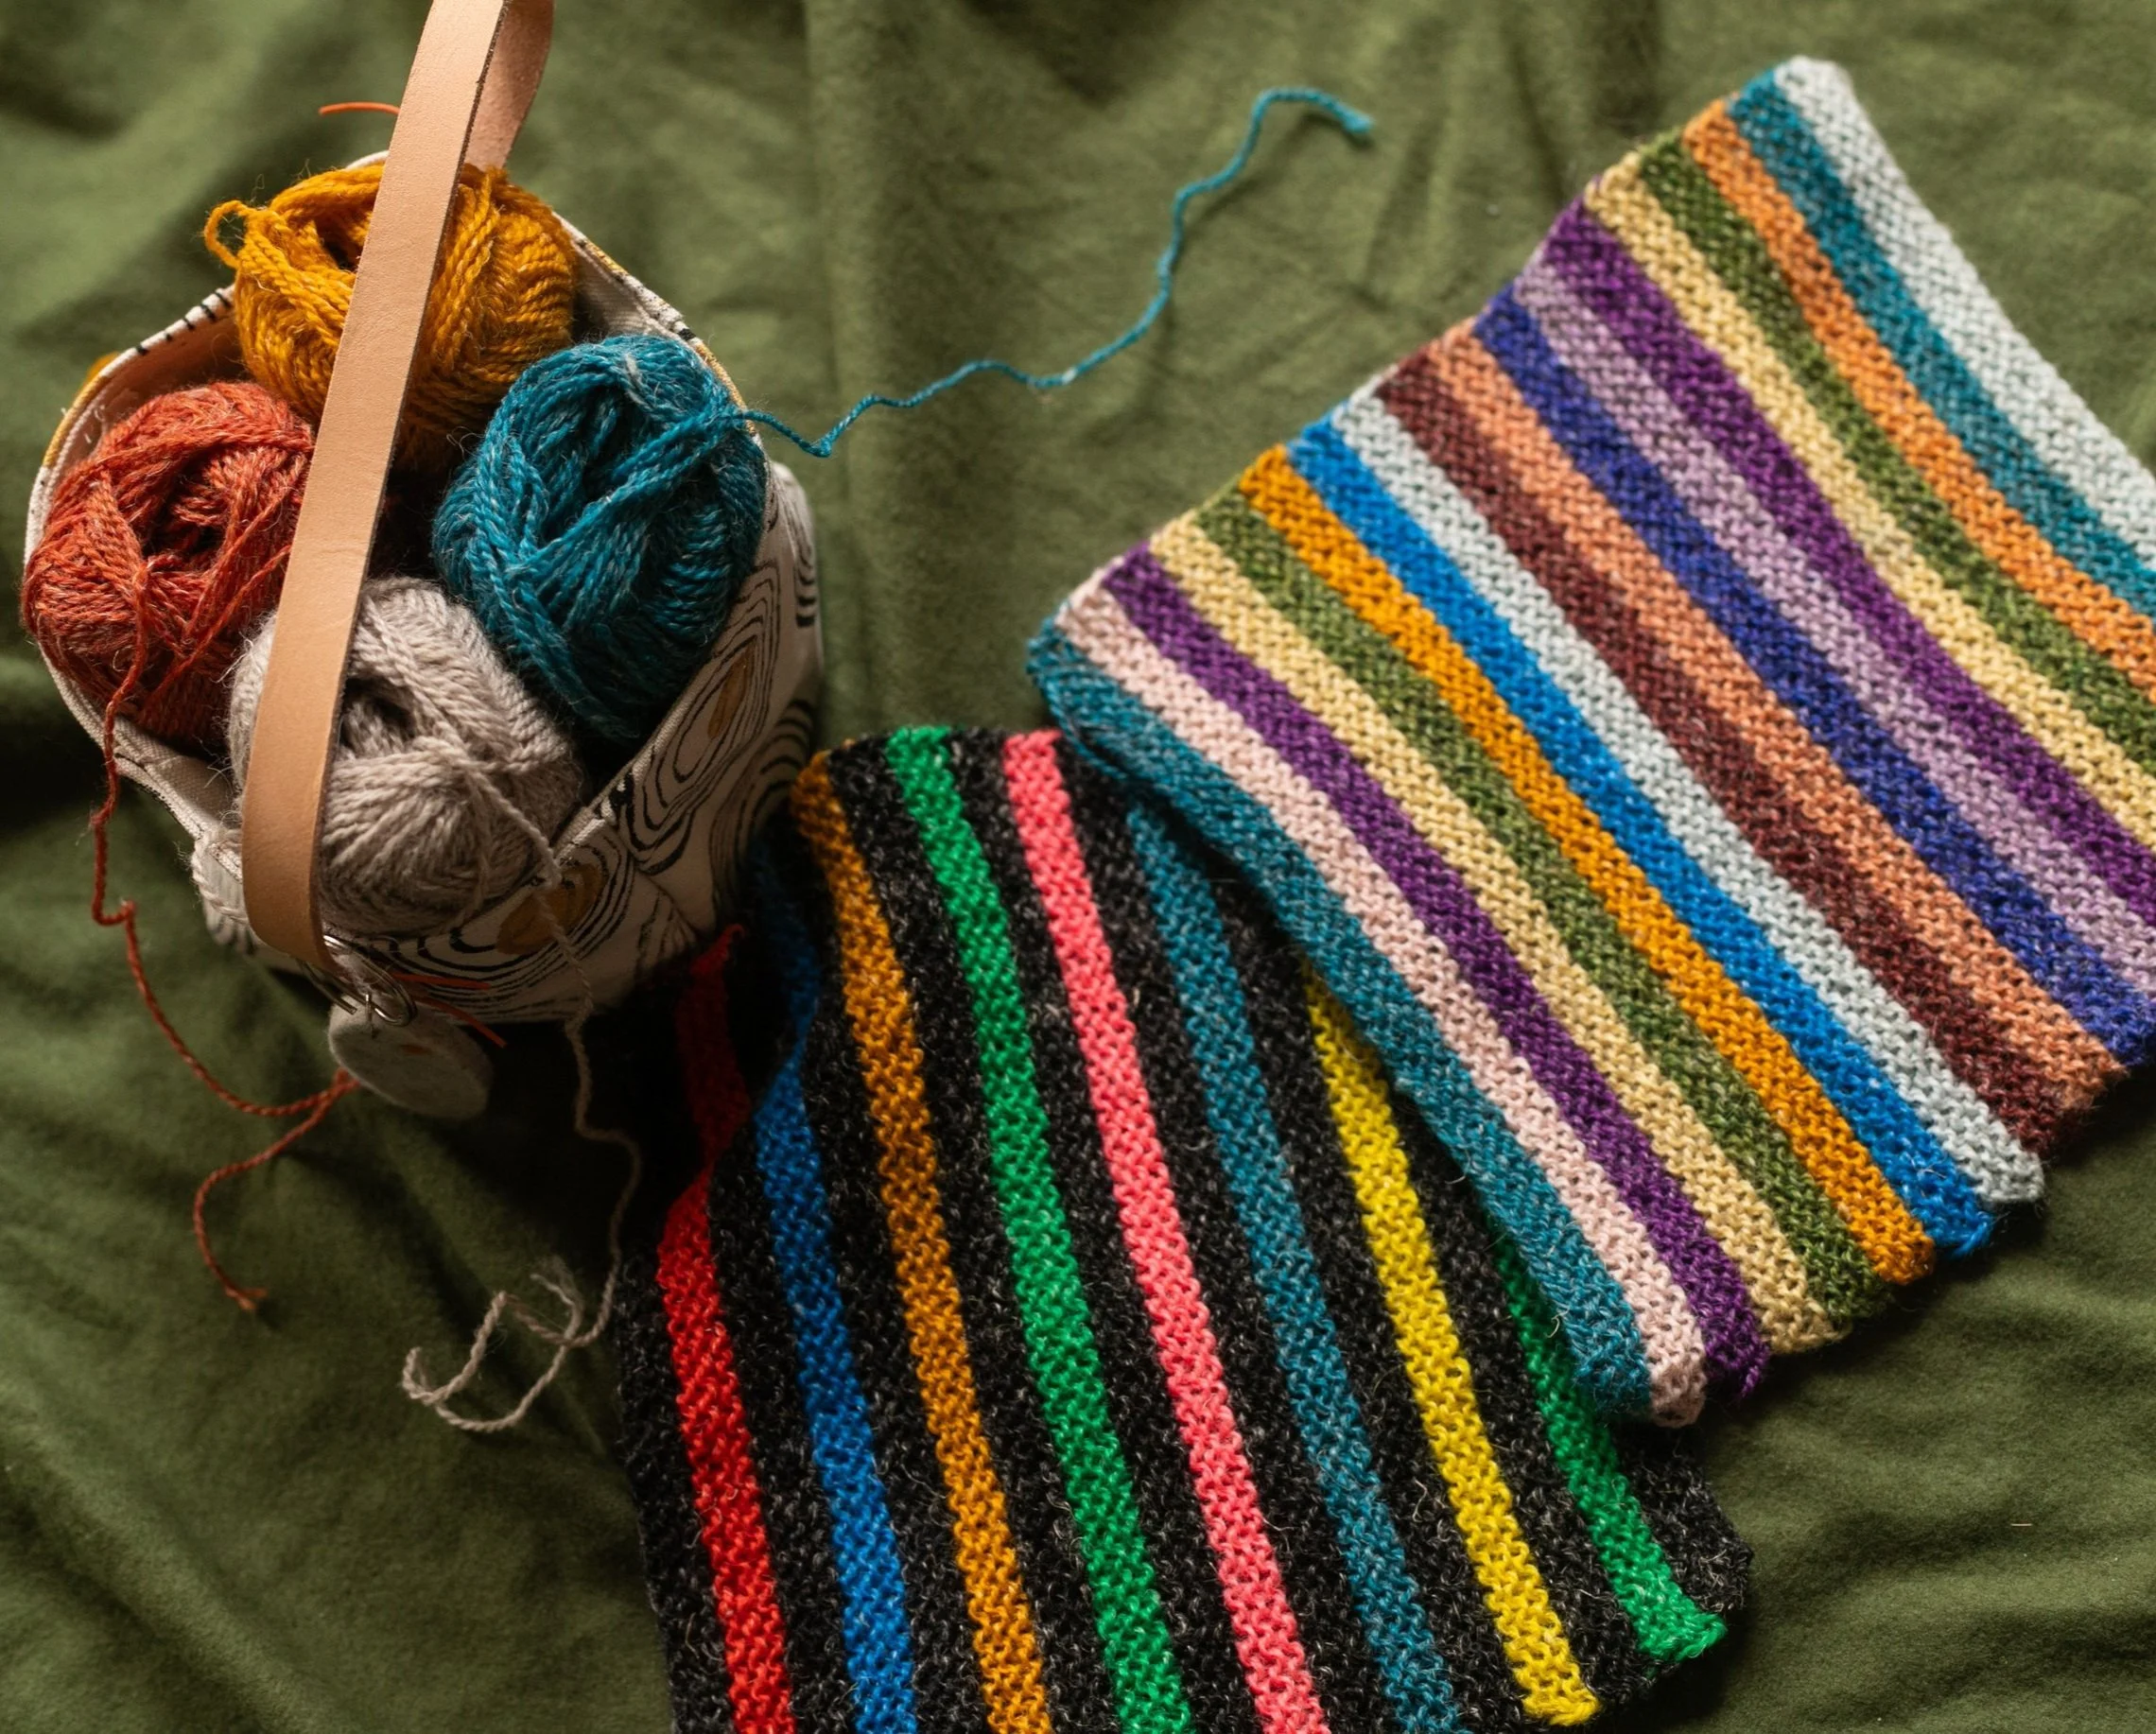
Linen Quill Mini swatches and the Mini Trug that’s holding just enough mini skeins to make the project portable
While this exercise didn’t require the croquis matching my body shape (I was just testing color combinations), I know for other sweater designs (such as Cocoon Cardigan), I would not want to do this exercise if the croquis didn’t represent my body. While my body shape is pretty standard, the fashion croquis are usually very elongated and wouldn’t give me an idea of how things fit in real life on real bodies. By the way, I’ve heard of My Body Model, an app that creates custom croquis that is unique to each person, and am intrigued to try it out. Have you tried it? If so, what are your thoughts?
After the previous two experiments, I came away with two favorites: Sweater 1 (the one that’s on my paper doll in the photo above) or Sweater 2 (the one to the left of my paper doll). I still wasn’t sure which one to pick. I asked for advice from my friend Patricia, and she reminded me of the advice that I like to give other knitters - knit bigger swatches, hahah! As much as I wanted to cast on this sweater already, I really didn’t want to have to frog a lot of hours’ worth of knitting. So, I made these two large-ish swatches to test out the final two contenders.
Making these swatches helped me realize that while I loved the idea of bright and bold color combinations in Sweater 1, I wouldn’t wear this sweater that often, whereas Sweater 2 seemed more versatile to wear and I had so much fun while knitting this swatch. It was very addicting and intriguing to keep going.
I will share the final result here when I finish my sweater and any and all of my takeaways from this adventure - so stay tuned!